Embed Soap Ribbons
You can easily make this fun, decorative soap by embedding soap ribbons (thin strips of soap) into your handmade soap base.
Some of the links on this site are affiliate links. If you buy a product through them, I receive a small commission which helps me provide the free information you find on this site. Thank you for your support!
This soap making idea is very easy to do and you can create a variety of decorative looks with it .
Try a solitary dark colour in light base or the opposite, a light colour in a dark base. Better yet, use multiple colours for a festive look.

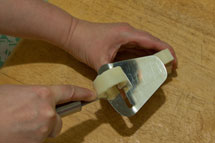
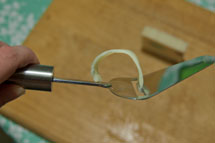
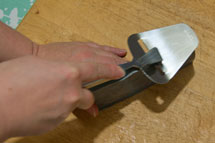
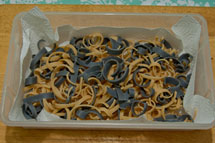
Start by using a cheese slicer to cut thin strips of soap. You can make a batch of soap specifically for making ribbon's, curls and chunks but don't forget that this decorative idea is a great way to use up soap ends and uneven bars. The strips can be any size, shape or colour.
 |
 |
 |
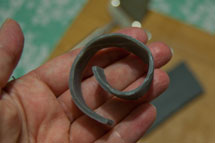 |
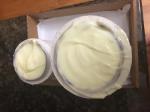
Create enough ribbons to loosely fill your soap mould. You can use less curls but do not pack too many in.
Remember that the soap and ribbons will fill the mould much higher than normal. You may want to have another mould on hand to put any extra base in if your soap mould fills too high. Alternately, you can make a smaller batch of soap base.
 |
 |
Once you're ready to make the soap, lightly warm the mould and ribbons in the oven with the additives while you make the base mixture. If it is quite warm where you are, you don't need to do this step.
To warm the ribbons, turn the oven on to it's lowest setting. Wait for it the oven to warm up and then turn it off.
Now place your soap mould, additives and soap ribbons into the oven. We don't want to cook the soap, just take the chill off.
This will stop what I refer to as temperature shock where you get a halo around each curl or ribbon of soap and it tends to ruin the look. Cold curls or ribbons can also result in chalky patches in your bars.
 |
 |
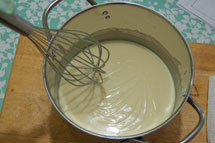
When your soap has reached a thin trace, start mixing in all of your additives.
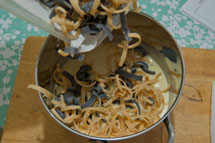
Begin with colour and botanicals, then the scent and end with the soap ribbons.
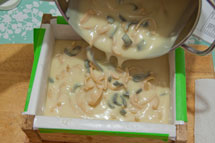
Pour the soap base into your soap moulds. Be sure to tap the mould onto your counter-top to remove any air bubbles that may have become trapped.
 |
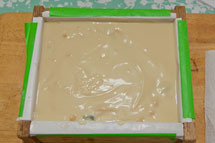 |
Insulate your soap as you normally would and once the soap is firm enough, cut it into bars.
Home › Decorative Soap Making Ideas › Embed Soap Ribbons
Like This Page?
Site Sponsors

If you've found this site to be helpful in expanding your soap making knowledge and would like to make a SMALL donation to help with the cost of maintaining this site, your support would be greatly appreciated.
Recent Articles
-
Forgot to add the lye!
 Well, it was getting quite late last night and I was finishing up my last batch of soap. I got my water mixture out of the fridge and whisked it into
 -
Allergic to nuts/coconuts
I'm interested in making my own soap and shampoo bars, but my young son is allergic to all nuts and possibly to coconut. Is there a recipe I can use or
Facebook Comments