Hot Process Soap Making Recipe

We've got another hot process soap making recipe for you to try! This time we're adding soap embeds as a decorative feature while also using up some of those random soap scraps that we all accumulate at an alarming rate!
Some of the links on this site are affiliate links. If you buy a product through them, I receive a small commission which helps me provide the free information you find on this site. Thank you for your support!
If you're like me and make soap for the sheer enjoyment of it, you have way too much soap on hand. With that comes the never ending supply of random sized soap bits.
Whether it's from cutting off uneven ends, from bevelling the soap edges or plain old ugly soap mishaps, you need ways to use up that soap.
This hot process soap making recipe will definitely use up a good chunk of soap bits you have lying around.
In fact, this recipe uses a full 1360 grams of shredded soap incorporated into my standard sized 900 gram batch! The final result is a double batch of soap with some lovely soap embeds and a nice reduction in your soap scrap supply.
Hot Process Soap Making Ingredients
Shea Butter - 180 gr. | 6.35 oz. | 20%
Coconut Oil - 270 gr. | 9.52 oz. | 30%
Olive Oil* - 270 gr. | 9.52 oz. | 30%
Canola Oil - 180 gr. | 6.35 oz. | 20 %
Distilled Water - 342 gr. | 12.06 oz.
Lye - 126.25 gr. | 4.45 oz.
Water as a % of oils = 38%
Super fat/discount = 5%
Additional Ingredients
Sodium Lactate - 2 tsp. (10 ml)
Kaolin Clay (cosmetic white) - 2 tsp. (10 ml)
Plain Full Fat Yoghurt - 1/4 cup (60 ml)
Finely grated/chopped soap bits for melting - 800 grams
Soap chunks for embeds - 560 grams
Sweet Birch E/O - 1/2 tsp (2.5 ml)
Lemongrass E/O - 1.5 tsp (7.5 ml)
Lemon 5 Fold E/O - 1.5 tsp (7.5 ml)
Yellow soap colourant - as needed**
*Reserve 45 grams of your olive oil to add at the end of the cooking process. This will be your super-fat.
**In this recipe I used a combination of annatto infused olive oil, yellow oxide and yellow soap dye. Use whatever you have on hand. If your soap shreds that are to be melted are dark in colour, consider using a darker soap colourant for your soap base. Be sure that your embeds contrast nicely with the base colour you have chosen in order to achieve the best visual impact.
Hot Process Soap Making Instructions
Below you will find instructions and a video for making hot process soap. I've tried to edit the video so it wouldn't be so long but it's still a little bit lengthy. Sorry about that but hot process soap making takes a little bit longer to make than regular cold process soap.
- Start the process by measuring out all of the additional ingredients and placing them aside.
- Measure out the liquid oils and place aside. Be sure to separate out 45 grams of the olive oil to add to the soap base after the cooking process as your super-fat.
- Measure out the hard oils and place them in your crock pot on the low or medium setting to start the oils melting.
- Prepare your lye solution and mix until the lye beads have fully dissolved. Pour the solution over the hard oils to speed along the melting process.
- Once the hard oils have fully melted, add in your sodium lactate and the liquid oils, except the reserved 45 grams for the super-fat.
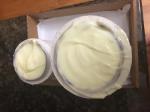
- Using your stick blender and whisk, bring the soap to a medium trace. Once that is done, you can add in the finely shredded soap bits. It might take a few minutes and some muscle power to get all the shredded soap mixed in. These will cook with the soap base until the whole batch reaches a full gel. It took approximately 1.5 hours for a full gel to occur with this batch due to the high amount of soap scraps used.
- Cover the crock pot with plastic film and place the lid on the pot. Allow the soap to cook for about 30 minutes and then give the soap a stir. Cover it back up and do the same after another 30 minutes.
- Once the soap has fully gelled, you can turn off the heat and add in the super-fat and yoghurt. Mix really well, place the lid back on the pot and leave for around 5 minutes.
- The soap should have loosened up and become more fluid during the last five minutes. Now you can adjust the colour of the soap base by adding in the soap colourant you have selected. Be sure to mix it in really, really well.
- For best results with dry powder soap colours, pre-mix the soap colourant in a small amount of olive oil and blend until all lumps have been removed before adding it to the soap base.
- Once the colour is mixed in, you can add in the essential oils. Again, be sure to mix it in really well.
- Now it's time to add in your soap embeds. I mixed mine into the soap base in batches until the entire amount was fully mixed in.
- When all the soap embeds are mixed into the soap base, you can transfer the soap into your soap mold. I had to use a large spoon to scoop the soap base into the mold since it was so thick.
- As you fill the soap mold, you can give the soap mold a gentle thump on the counter to make sure the soap does not have hollow spots and air pockets. When the mold is full, smooth the top and allow the soap to cool.
- The soap should be ready to cut in about 24 hours and can be used right away but for best results, let the soap harden for a week or two before use.

Home › Palm Free Soap Recipes › Hot Process Soap Making Recipe
Like This Page?
Site Sponsors

If you've found this site to be helpful in expanding your soap making knowledge and would like to make a SMALL donation to help with the cost of maintaining this site, your support would be greatly appreciated.
Recent Articles
-
Forgot to add the lye!
 Well, it was getting quite late last night and I was finishing up my last batch of soap. I got my water mixture out of the fridge and whisked it into
 -
Allergic to nuts/coconuts
I'm interested in making my own soap and shampoo bars, but my young son is allergic to all nuts and possibly to coconut. Is there a recipe I can use or
Facebook Comments